How to Set Up Google Search Console: Add and Verify Your Website
Learn how to set up Google Search Console by adding your website and verifying ownership, with step-by-step instructions and screenshots.
By: Ed Harris · Published: June 14, 2022 · updated: June 28, 2024

Google Search Console is a free tool that provides data about a website’s organic Google search impressions, clicks and position in the Google Search Engine Results Pages (SERPs). In addition to this search performance data, Search Console also provides valuable insight into which URLs on your website Google has discovered, crawled, and indexed, along with insights about errors or warnings that might be limiting your search visibility.
Search Console only makes this data available to verified website owners. Once you have verified ownership of your website, you can also delegate access to other users to access the data.
In this short guide, we walk through how to add your website to Google Search Console and verify ownership.
How to add your website to Search Console and verify ownership
Follow the steps below to get started with Google Search Console:
1. Sign in to Google Search Console
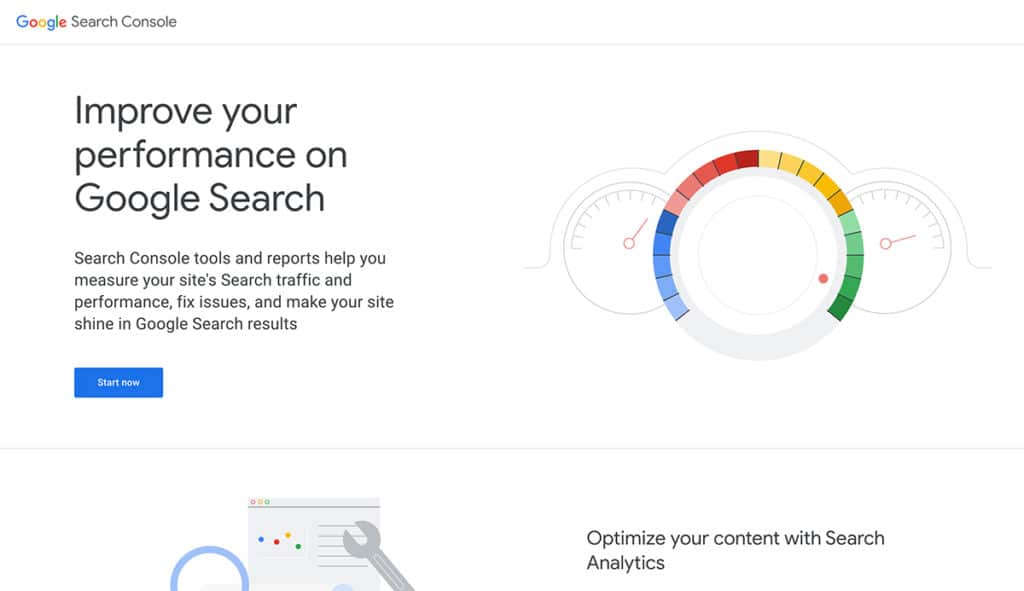
To get started, visit https://search.google.com/search-console/ in your browser and click the blue Start now button. If this is your first time using Google Search Console, you’ll need to sign in with a Google account. We recommend using the same account you use to access other Google services, such as Google Analytics.
2. Add a Property
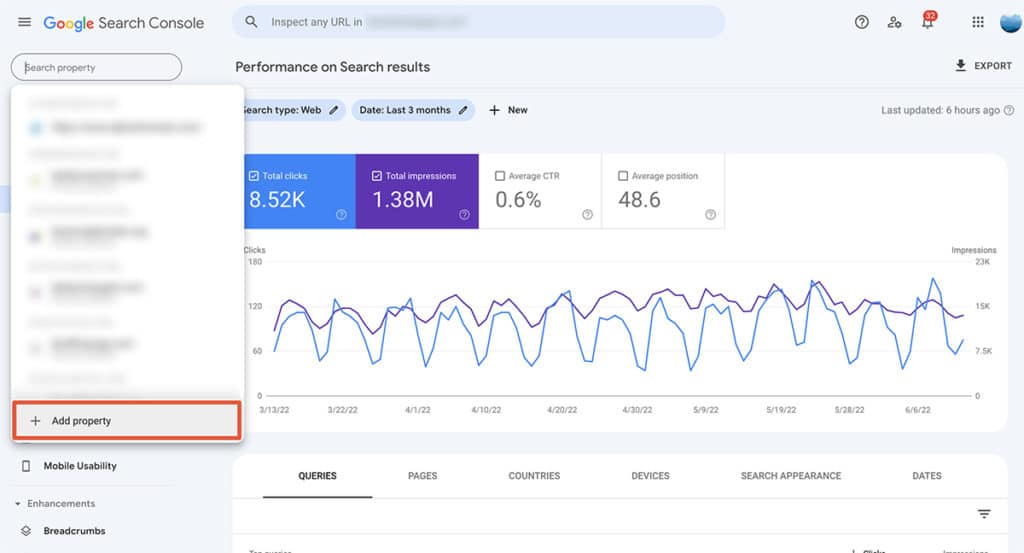
After signing in to Google Search Console, you can access dashboards for any website properties you already have access to, either as an owner or as a user with specific permissions. If you have access to multiple properties, click on the Search property box near the top left corner of the screen to select the property you want to view.
If you are signing in for the first time and have no properties to view, you’ll see a prompt to add your first property.
If you already have access to other properties and need to add a new one, click the Search property box as illustrated below and then click the + Add property option below your existing properties.
3. Choose your property type
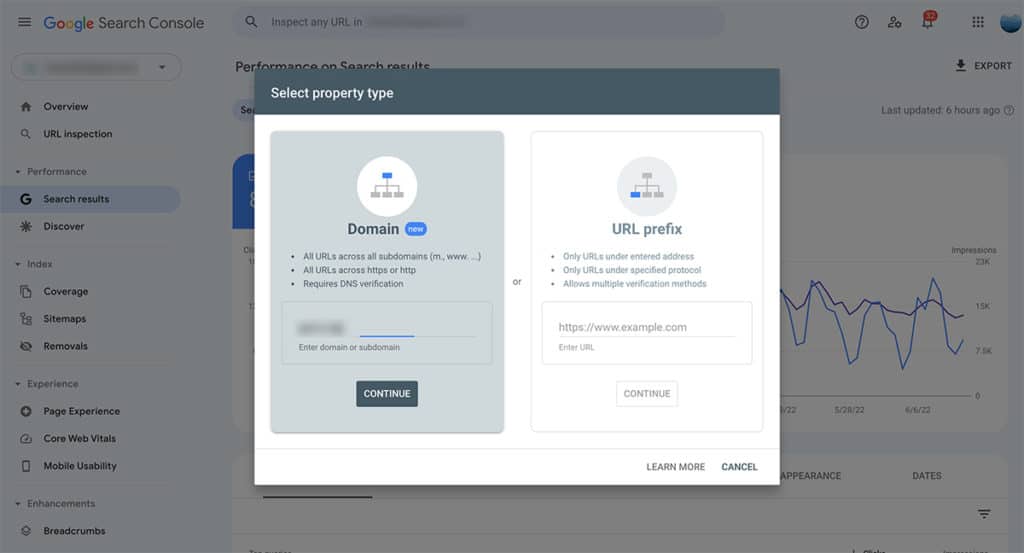
Google Search Console allows you to create a property that collects data for an entire domain, or is limited to a specific URL prefix.
- A Domain property is a good fit if you have a simple website with no subdomains, or if you want to see data from your primary domain and subdomains all aggregated into one property. Note that you will need access to you Domain Name Server (DNS) records to verify ownership of your domain. To set up a Domain property, enter your root domain (e.g. example.com) in the domain field.
- A URL prefix property allows you to collect data from specific domains or subdomains. Add the URL exactly as it appears in your browser (e.g. https://www.example.com) in the URL field. Note that if your website supports both non-www and www versions of URLs or allows both http and https connections (it shouldn’t!), you’ll need to create multiple URL prefix properties to capture all of these variables. Note that URL prefix property allows for multiple different verification methods. This is helpful if you don’t have the ability to add a DNS record for verification.
Read more about the differences between domain and URL prefix properties in this Google Search Console support article.
Tl;dr – a domain property is the best fit for most users getting started with Google Search Console. However, if you have more complex reporting needs or cannot edit DNS records, you may want to consider using a URL prefix property instead.
Once you have completed either the domain or URL field, click the relevant Continue button.
4. Verify domain ownership
At this stage, we’re assuming you’re setting up a domain property. If you are using a URL prefix property, you will see some different options on this screen.
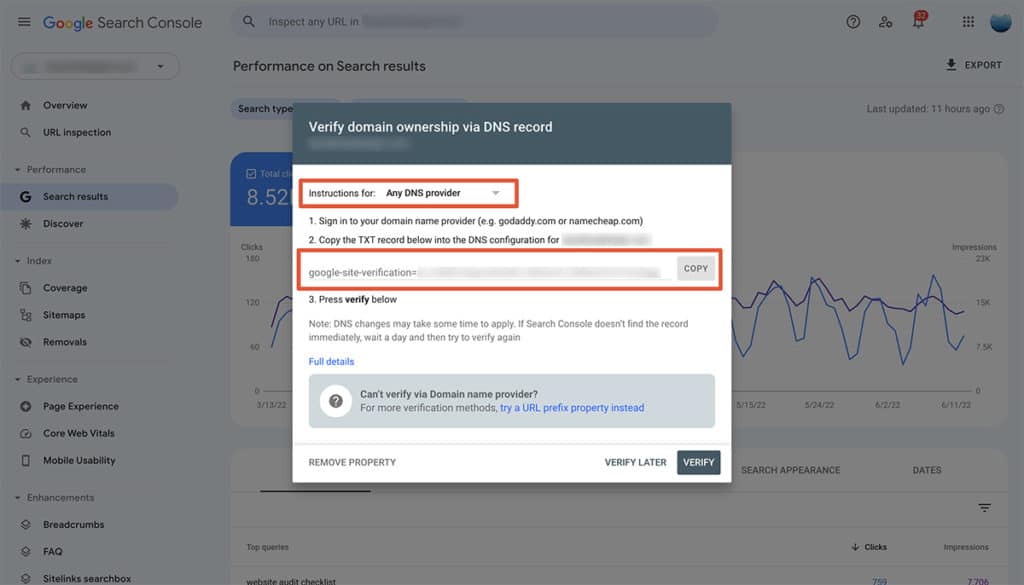
By default, Search Console will attempt to provide domain verification instructions that match your DNS provider. For example, if your domain is registered with GoDaddy and you also use GoDaddy for DNS hosting, you may see specific instructions for GoDaddy in the dropdown menu highlighted in the first red box below.
If you don’t see specific instructions for your DNS provider, you can view generic instructions for Any DNS provider, as illustrated below. To verify ownership, you need to log in to your DNS provider and create a new TXT record in your DNS, pointing to the value provided in the dialog box.
After saving this new TXT record, you can click the Verify button. DNS changes often take a few minutes (or sometimes longer) to propagate, so don’t be surprised if you see a message saying that verification failed when you first click Verify. Go refill your coffee and give it a few minutes — then you’ll likely see the success message when you prompt the verification check a second time.
Update: as of July 2022, you now have the option to add a CNAME record instead of a TXT record to verify ownership. See this update from the Google Search Central Twitter account.
5. Verification success
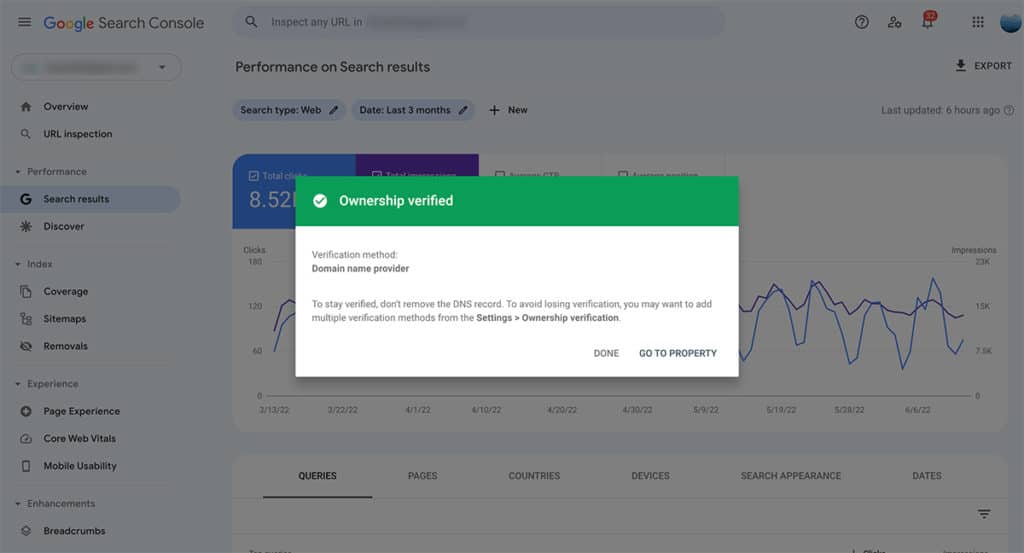
Here’s a screenshot of what the verification success message looks like. If you get to this point, congratulations: you’ve successfully added and verified a new domain property in Google Search Console!
Click Go to property to exit the verification flow. At this point, you’ll need to wait a couple of days for data to start populating in the dashboard. Google Search Console data is not available in realtime, and typically refreshes daily, with a delay of 24-48 hours.
Troubleshooting verification
Pause and verify later
If you don’t have all the information you need to complete the verification process, you can click the Verify later prompt in Step 4 above. When you do this, the unverified property will remain in your Google Search Console list of properties, accessible from the Search property field in the top left of the dashboard.
When you are ready to complete the verification process or need to return and check on a verification process you were waiting to complete, access the property from that drop-down list to finish the steps.
Remove or re-add a property
To remove a property, navigate to the Settings menu in the left bar of the dashboard. At the bottom of the main Settings dashboard, you’ll see a Remove property button, which will remove the property from your Search Console account.
You can re-add a property that was previously connected to your account but has been removed since without going through the verification process again, provided the domain still has one other verified owner. If the domain no longer has any verified owners, you will need to complete the verification process again.
Disclosure: some of the links below are affiliate links, meaning that at no cost to you, we will earn a commission if you click through and make a purchase. Learn more about the products and services we recommend here.
Set up position tracking for your most important keywords
Google Search Console provides valuable insight into the search queries (or keywords) that are bringing visitors to your website from Google searches.
A great next step to leverage this information is tracking the position your webpages have in the search engine results page (SERP) rankings for the keywords that are most important for your work. For example, a position between 1-10 for a particular keywords means that a page from your website is being shown by Google on the first page of the search results.
Google Search Console doesn’t offer keyword position tracking, but several third-party SEO tools include position tracking in their product suites. We recommend checking out the position tracking offerings from Semrush or SE Ranking to find a tool that works for you. In both cases, you’ll need to input a list of keywords you want to track (Google Search Console query reports will help here).
If you need more help or guidance about setting up keyword position tracking, get in touch.
Table of Contents

